


Installing the CrowdStrike Falcon Sensor has sometimes been a challenge on Macs, especially without using a mobile device management (MDM), and recent re-releases from Apple have only amplified that.
Users have been required to approve kernel extensions (kexts) within the Security & Privacy window for each app that uses them since macOS 10.14 (Mojave). However, with macOS 11 (Big Sur), Apple has made their position regarding kexts even more clear by forcing users to agree to “Reduced Security” mode from the boot menu before they even get those approval requests.
Furthermore, starting in late 2020, Apple has begun shipping computers that use their own proprietary chip – the Apple Silicon or M1 – rather than Intel processors. Many applications specifically built for Intel-based Macs require a “translator” to work on M1 Macs. This translator is called Rosetta and is free to download, install, and use, but it can feel like another speed bump for end users (or admins) who are trying to deploy applications across a varied landscape of user devices.
What do these new releases mean for institutions that rely on CrowdsSrike for their security? The good news is, it is still possible to manually install the CrowdStrike Falcon Sensor on a Mac running Big Sur and using the M1 chip, it just takes a couple extra steps. See below for the full installation guide.
For more information about kext extensions in macOS, check out this guide from Apple; and for more information about Rosetta, check out this article.
Enable Kernel Extensions
- Shut down the computer.
- Once it is off, hold down the power button until you see the following screen:
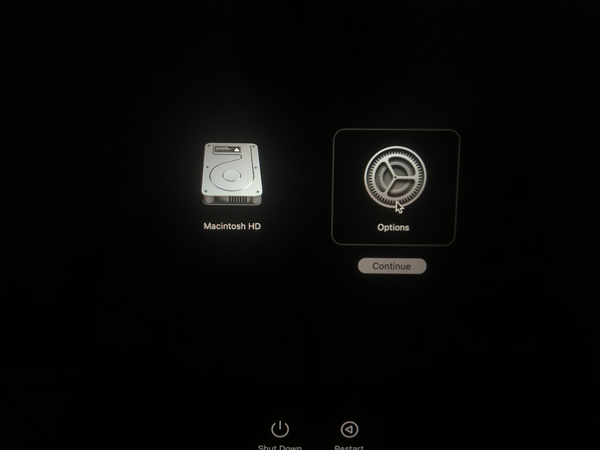
- Click Options.
- Click Utilities > Startup Security Utility.
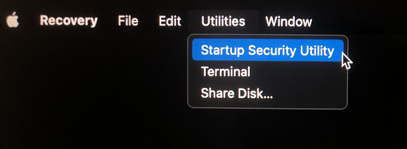
- Click Security Policy.
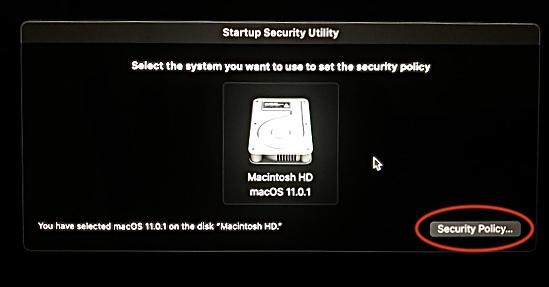
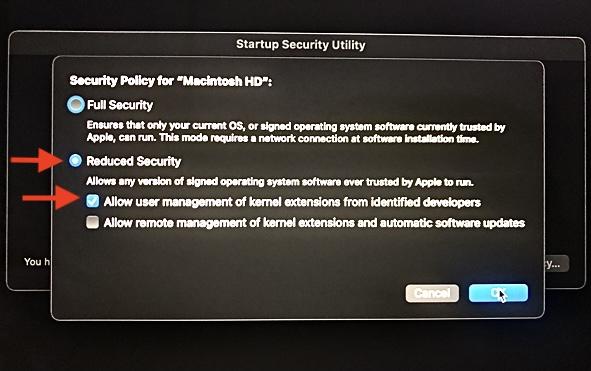
- On the following screen:
- Select Reduced Security.
- Check Allow user management of kernel extensions from identified developers.
- Click OK.
- Restart the computer and boot up normally.
Install Rosetta 2
- Launch Terminal.
- Run the following command: /usr/sbin/softwareupdate --install-rosetta --agree-to-license
Install CrowdStrike Falcon Sensor
- Download the sensor installer.
- Run the sensor installer on your device using one of these two methods:
- Double-click the .pkg file or
- Run this command at a terminal, replacing <installer_filename> with the path and file name of your installer package: sudo installer -verboseR -package <installer_filename> -target /
- When prompted, enter administrative credentials for the installer.
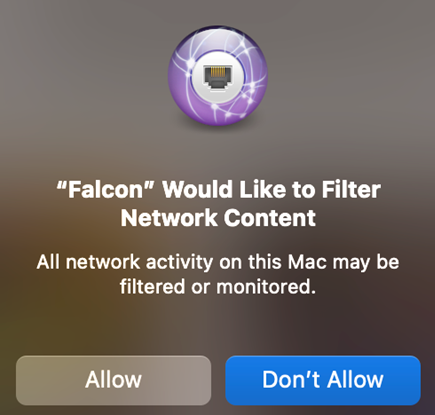
- Click Allow when Falcon asks to monitor network activity:
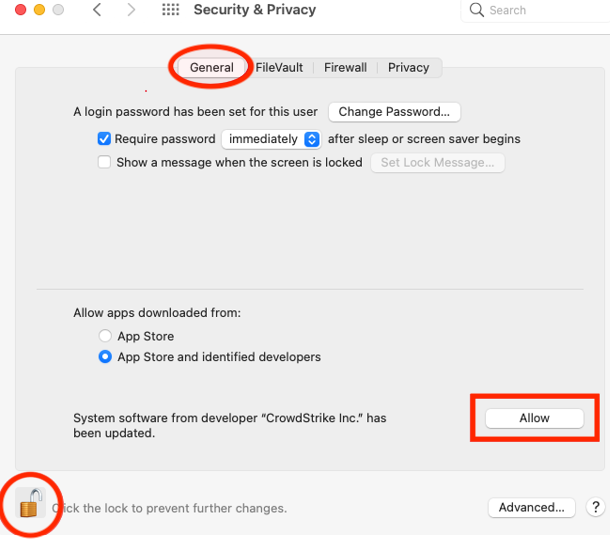
- Click Open Security Preferences when “CrowdStrike Inc.” tries to load a new system extension:

- In the Security & Privacy window…
- Click on the General tab.
- Click the padlock icon and enter administrative credentials to unlock.
- Click Allow next to the notification about “CrowdStrike Inc.”
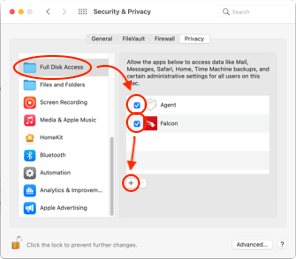
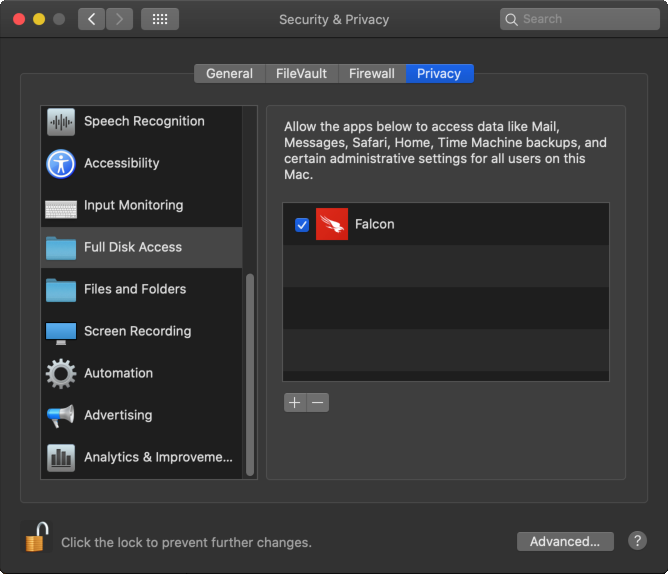
- Still within the Security & Privacy window…
- Click on the Privacy tab.
- In the left pane, select Full Disk Access.
- In the right pane, scroll through the list and check both Agent and Falcon.
- Click the + button.
- Still in the Security & Privacy window…
- Click the padlock icon again to lock it.
- Click the padlock icon again to lock it.
Confirm the CrowdStrike Falcon Sensor Installed Successfully
- Launch Terminal.
- Run the following command: sudo /Applications/Falcon.app/Contents/Resources/falconctl stats
The output should show details about the sensor, including its agent ID (AID), version, customer ID, etc.


Comments